

Lesson Plan | Barbara Rossi: “Magic Drawings” – MMoCA
Artwork
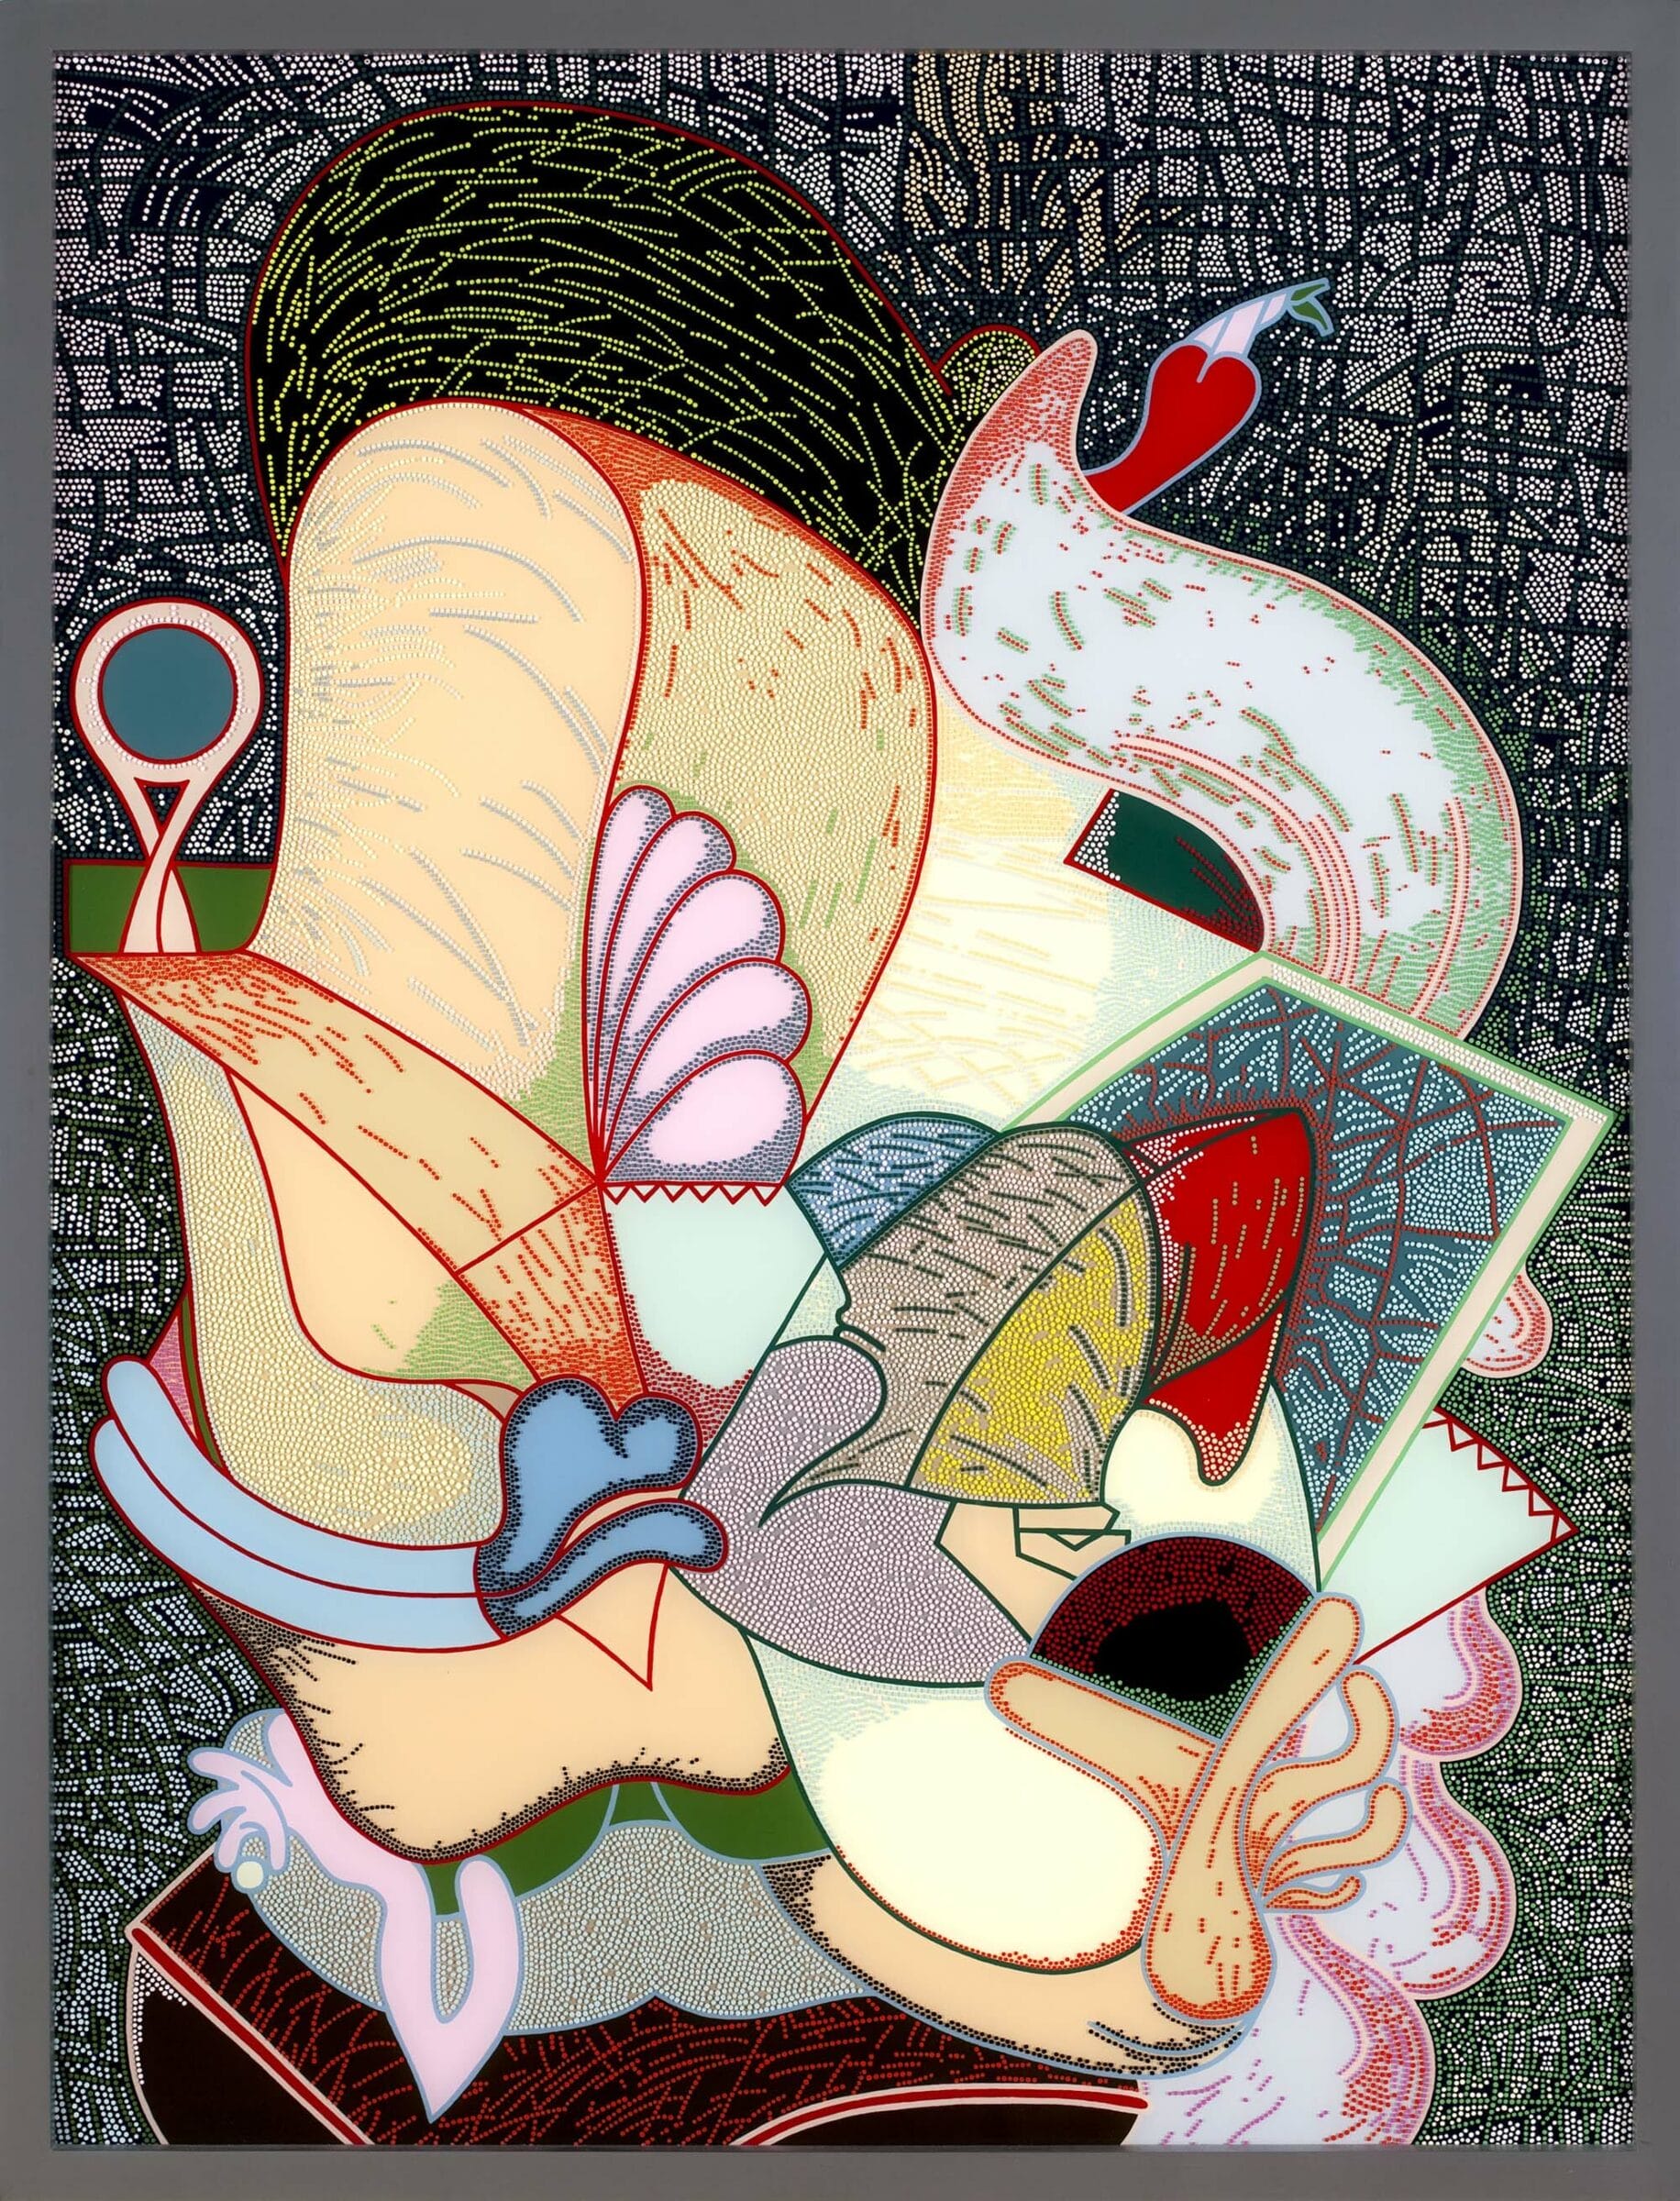
Eye Deal, 1974, acrylic on Plexiglas
Subjects
Visual Art, Language Arts
Author
Kristine Gruninger, art educator
Essential Questions
- What conditions, attitudes, and behaviors support creativity and innovative thinking?
- How do artists work?
Grade Level
2-3
Objectives
- Students will create an imaginative work of art without use of a sketch or a plan, learn the difference between abstract and realistic art, and use texture and pattern to add detail.
Activity
This activity focuses on the creation of a “magic drawing” in the style of Barbara Rossi. This will be achieved by using printed lines to create shapes that build on each other, allowing an image to evolve. No preliminary sketches or plans will be used.
Introduce the work of Barbara Rossi and her painting, Eye Deal. Announce to students that they will be learning how to make a magic drawing. Explain that when Barbara Rossi started an artwork she didn’t have a plan or an idea of what it would look like when it was finished. She kept an open mind and let her drawings develop into what they would become. She called her work “magic drawings.”
Discussion Questions
- What do you notice when looking at the painting, Eye Deal? Do you see an image—an eye, a nose, and a mouth, for example? Or possibly something that reminds you of these facial features?
- What is a realistic work of art? What is an abstract work of art?
- What might the artist be trying to show?
Instructions
Part 1: Printed Lines and Shapes
Materials
12 x 18-inch sheets of colored construction paper, 12-inch pieces of yarn, plates of black tempera paint to share, paint brushes
Begin by dipping a length of yarn into the black paint using the handle of a paint brush to push it down into the paint.
Using a 12 x 18-inch sheet of paper and starting in the center, as Barbara Rossi did, place the yarn on the paper using the handle of the paint brush to guide it. Let the yarn crisscross itself to create shapes. Lift the yarn to reveal a printed line.
Have students use their artist’s eye to decide where the yarn should be placed next. Let the lines connect or crisscross to create more shapes. Tell them to continue to print lines, building shapes from the middle toward the edges of the paper. Instruct them to stop when they are satisfied with the arrangement of lines.
Part 2: Painting the Image
Materials
Various colors of tempera paint, paint brushes, mixing plates, water
Turn your paper so your “magic drawing” can be looked at from each side.
Do you see an image? Do you want to develop that image or look for a different one? If you don’t see an image, that’s okay. You can still paint the shapes.
Ideas for painting the shapes: use one color, mix two primary colors, or add white to create a tint. Students can mix paint on a plate or add one color to another directly on the paper. Set aside to dry.
Part 3: Adding Detail
Materials
Tempera paint, oil pastels, scraps of paper, hole punches, stamps, etc.
Barbara Rossi created texture and pattern in her art by carefully applying dots of paint and outlining shapes with colorful lines. What other types of marks could be used to apply texture, define shapes, and create patterns? Brainstorm a few.
Add texture and pattern details.
To finish, try adding a few cut-out paper shapes or possibly some object prints.
Give your artwork a fun title.
Concluding Discussion
- What was it like to make a “magic drawing” without using a plan or an idea?
- Were you surprised by what it turned out to be?
- Were you able to keep an open mind?
- Does your artwork tell a story? If so, what story does it tell?
Adaptations
- Use blended pastels or oil pastels in place of tempera paint
- Create the design by using cut-out paper shapes and building the image outward from the center
- Adapt for older students by having them create a background
Materials
12 x 18-inch sheets of colored construction paper, 12-inch pieces of yarn, plates of black tempera paint to share, mixing plates, water, paint brushes, oil pastels, scraps of paper, hole punches, stamps, etc.
Vocabulary
Symbol, graphic image, repetition, scale, deckle edge, unity, rhythm, whimsical
Extensions
Language Arts